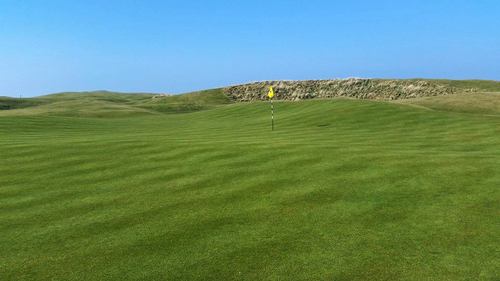
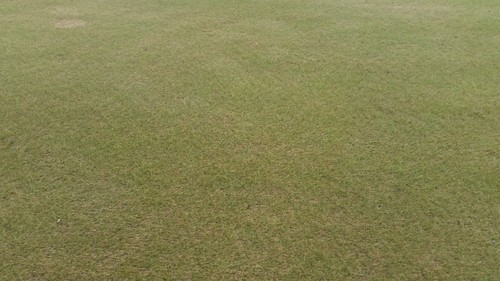
Spring is here!! Well…it`s here a bit. At least the days are getting longer now, and the average temperature has come up far enough for the grass to actually start growing. We’re certainly enjoying the start of the new season, especially with the course looking remarkably healthy after this brutal winter – but that doesn’t mean we have time to slow down!
I always refer to this time of year as a transitional period, when we seem to rush around preparing the course for the season ahead while simultaneously finishing off the rough edges of our winter projects. It`s an exciting time for a greenkeeping team, as we can enjoy putting all our freshly painted furniture back out on the course and admiring the work we’ve done to improve the course over the winter.
All the tees we built this winter seem to have rooted really well into the rootzone we mixed up (local sand mixed 3 to 1 with good quality indigenous topsoil sourced from the quarry alongside the 10th tee), and the work we have done to the paths has dramatically improved some of the weaker and more hazardous walkways on the golf course. I`m particularly pleased with the contouring work we did to the 17th fairway as it dramatically improves the visibility of the green from the fairway, but looks entirely natural. It leads into what I think is the best new path on the course, which directs players over Craig and Sebastian`s huge extended boardwalk. The greens look pretty strong going into the season, with some good root development and a decent coverage of healthy grass which should let us produce a good early season putting surface for you all to enjoy playing on.

Post-winter course conditions are the best they’ve been in years!
Why We Topdress the Greens
There are certain crucial applications which we make around this time of year which can make or break a season before it has even got properly started, and timing of these is always critical. Having curtailed the leatherjacket invasion last month, and timed an application of penetrating wetting agent perfectly during the first week in March, we were keen to get our first topdressing onto the greens this week (I write this on March 24th). When I say keen, I mean we were keen to do this as part of the program, not because we enjoy this job. In fact, I would go as far as to say I really don`t like topdressing at all. Not because I am shy of a bit of hard manual labour (everybody knows that`s not the case!) but because I know how much it disrupts everybody`s game. I actually had somebody ask me once in all seriousness whether we put sand on the greens just to annoy the golfers, and – to be honest, if I put myself in the position of that golfer, I can clearly see that covering a perfectly good golf green in sand might seem like a strange thing to do.
So why do we do it? Truth be told, because every set of greens is different, every greenkeeper has slightly different goals he wants to achieve when he goes topdressing. Our common aims, though, are to fill in surface imperfections, improve ball roll, and, most importantly of all, to keep the upper portion of our rootzones relatively dry, lean and oxygenated. If we allow debris from decaying plants and other organic matter, such as spilled clippings from grass boxes, to build up on the surface, we will very quickly come to regret it as a soft thatch layer will build up in the top 2 to 3 inches of the soil profile which will inhibit root growth, harbour disease pathogens, encourage the ingress of annual meadow grass in preference to perennial bents and fescues and produce a spongy surface which is slow and inconsistent to play on.
After many years of poor agronomic practice and poor advice, many courses already have greens like these, and thanks to the inactivity of their predecessors, the greenkeepers who work on these courses need to battle hard to produce even average surfaces outside of the mid-summer months. Here at Machrihanish Dunes, we are blessed with brand new, light, sandy rootzones which we have the opportunity to protect and even improve by using good quality materials and following proven methods to ensure that thatch layers are not allowed to build up and that we retain the excellent, naturally firm greens that we inherited from the construction team. This is why we endeavour to favour the growth of slow-growing perennial grasses which require minimal feeding (which links well with our overall environmentally aware mission statement), and why we regularly apply sand to the surface to dilute any thatch which does build up. This ensures that there is sufficient oxygen in that upper profile to protect the health of beneficial bacteria which feed on any organic material which is deposited, producing humus and carbohydrates that are returned directly to the plant`s food chain. We must endeavour to do whatever we can to make sure this chain of events is not interrupted, because it is incredibly difficult to link it back together again.
So unfortunately – as much as we all hate it – the topdressing of greens is a necessary evil that is here to stay as part of every greenkeeper`s maintenance regime. I hope that now you have an understanding of why it must be undertaken.
How We Do It
Step 1:
Sebastian spreads sand as evenly as he can onto the surface of the green. We must wait 10-15 minutes for this sand to dry before we can begin to brush it in. This is usually the 10-15 minutes when several 4-balls that we were not expecting arrive on the tee! We do have a custom-built spreader that we can use to apply the sand to the green, but because it is early in the season and the fully loaded machine is very heavy, we chose on this occasion to apply the sand using a more laborious and time-consuming method…completely avoiding the potential for leaving deep ruts that would be aggravating to putt over. If there`s an easy way and a right way to do a job, we will always choose the right way!
Step 2:
The sand has dried and I have run over it in two directions with a specially designed brush which I tow behind a greens triple. Although the surface isn`t yet playable, you can see that the brush has pulled the sand into a uniform layer over the whole green.
Step 3:
After I have brushed the sand as evenly as I can over the whole green, I use a flexible switch to flick the dry sand from grass leaves into the profile below and to remove as many small stones from the greens surface as I can. Actually looks quite playable now, doesn`t it! A shower or two of rain to wash this in and you would hardly know that Sebastian and I had even been here.

Enjoy your golf in April, we look forward to seeing you out there!

